

A Toronto homeowner usually notices carpenter ants in a very ordinary moment. A few large black ants cross the kitchen counter after dinner. One shows up on the bathroom floor the next night. Then another appears near a basement window, and the worry changes from annoyance to something heavier. If these are carpenter ants, are they just foraging from outside, or are they already nesting inside the house?
That concern is reasonable in Toronto homes, especially where basements stay damp, decks age unevenly, or a small roof leak has gone unnoticed through a humid stretch. Carpenter ants aren't like the small nuisance ants that wander in for crumbs and disappear. They often point to a moisture problem, damaged wood, or a hidden void where a colony has settled.
The first job is to slow down and confirm what's happening. Large ants in a kitchen don't automatically mean structural nesting, but they do justify a careful inspection. A practical place to start is with visible risk areas such as deck framing, porch posts, window trim, sill plates, and any wood beside chronic moisture. For exterior wood exposure, it also helps to check your deck with XTREME EDEALS because weakened or water-damaged deck components can overlap with the same conditions carpenter ants prefer. Homeowners who want a fast visual reference can also review carpenter ant damage and signs before beginning a room-by-room inspection.
Table of Contents
- Introduction Spotting the Signs of a Carpenter Ant Invasion
- Confirming a Carpenter Ant Problem in Your Toronto Home
- DIY Carpenter Ant Treatments and Their Limits
- Creating a Carpenter Ant Proof Home Environment
- When to Call a Professional Exterminator in Toronto
- Ensuring Safety During Carpenter Ant Treatment
- Frequently Asked Questions About Carpenter Ants
Introduction Spotting the Signs of a Carpenter Ant Invasion
Finding a few ants inside doesn't always mean a major infestation, but carpenter ants deserve more attention than most Toronto residents give them at first. They're larger than common kitchen ants, they often show up near damp wood, and they can stay hidden in wall voids, window frames, porches, attics, and basements long before the colony is obvious.
A useful first step is to think about pattern, not just presence. One ant near a sink may be a forager. Repeated sightings in separate rooms, especially in the evening, suggest a route worth tracing. Homeowners should check where plumbing enters walls, where wood touches masonry, and where condensation or leaks have softened trim, joists, or framing.
A practical first inspection checklist
- Watch evening activity: Carpenter ant movement often becomes easier to spot later in the day, so sightings after dinner matter more than a random daytime ant.
- Check moisture zones: Look under sinks, around tubs, near dishwasher spaces, inside basements, and around attic leaks.
- Inspect wood that sounds or feels off: Soft trim, bubbled paint, stained framing, and damp deck posts deserve a closer look.
- Look for debris: Sawdust-like material near baseboards, window frames, crawl spaces, or porch areas can be a warning sign.
- Follow the trail if possible: A line leading toward a wall void, foundation crack, soffit area, or porch structure gives valuable direction.
Practical rule: The best early inspection isn't the broadest one. It's the one that follows moisture, damaged wood, and repeat ant activity in the same part of the home.
Toronto homes often create perfect carpenter ant conditions without obvious neglect. Older brick homes can trap moisture around window frames. Finished basements can hide leaks behind drywall. Backyard decks and fences can age from the bottom up. That's why learning how to treat for carpenter ants starts with the structure itself, not the spray bottle.
Confirming a Carpenter Ant Problem in Your Toronto Home
You come downstairs late at night, switch on the kitchen light, and spot a few large black ants moving along the counter edge or disappearing behind the baseboard. In Toronto, that kind of sighting often means more than a nuisance ant problem. It can point to damp wood, a hidden nesting site, or a satellite colony tucked into a wall, window frame, porch connection, or ceiling void.

What separates carpenter ants from other wood pests
Correct identification comes first. Carpenter ants do not eat wood the way termites do. They hollow it out to create galleries, usually in material that has already been softened by moisture. The result is a different pattern inside the home. You are more likely to find frass that looks like coarse sawdust, insect parts mixed into debris, or smooth gallery spaces hidden behind trim and drywall.
Homeowners who are unsure whether they are dealing with termites or carpenter ants should compare the signs in this guide to carpenter ant vs termite. In the field, that distinction changes the whole treatment plan.
One of the most useful confirmation signs is repeat indoor activity, especially in the evening and in the same area of the house. A single ant near a sink can be incidental. Regular sightings around one window, one bathroom wall, or one section of the basement usually justify a closer inspection inside the structure.
Where carpenter ant activity usually shows up in Toronto homes
Toronto properties have a few predictable trouble spots because of freeze-thaw cycles, older construction, and hidden moisture that lingers after winter.
- Basement window framing and sill areas: Condensation and minor seepage can soften wood over time.
- Attic wood near vents, chimneys, and roof penetrations: Slow leaks often stay hidden until ant activity appears.
- Porches, deck attachments, and stair stringers: Snow, rain, and shaded drying conditions keep these areas damp longer.
- Kitchen and bathroom wall voids: Plumbing lines create warmth, moisture, and concealed travel routes.
- Garage trim and framing near the slab or door: Wetting from vehicles, slush, and temperature swings can break wood down gradually.
A proper confirmation check is simple but deliberate. Look for frass beneath trim or window frames. Press suspect wood gently with a screwdriver handle to see if it feels hollow or weak. In quiet conditions, put your ear close to the wall or void where activity repeats. Large colonies sometimes produce faint rustling inside damaged wood.
Fixing a leak matters, but it does not confirm whether the colony is outside, inside, or already split into satellite nests.
That is why moisture evidence should be taken seriously. If the ants are turning up near stained drywall, peeling paint, or a musty wall section, review the top signs of wall water intrusion and compare them to the part of the home where activity keeps returning.
Winged ants indoors are another strong warning sign. In many Toronto homes, swarmers show up only after the colony has been established long enough to reproduce. At that point, store-bought treatment often misses the actual problem because the visible ants are only a small part of the population.
If the trail leads into a wall void, under a porch, or into structural wood that feels damp or damaged, the problem has moved past basic observation. That is usually the point where a trained inspection saves time, avoids guesswork, and prevents more structural damage.
DIY Carpenter Ant Treatments and Their Limits
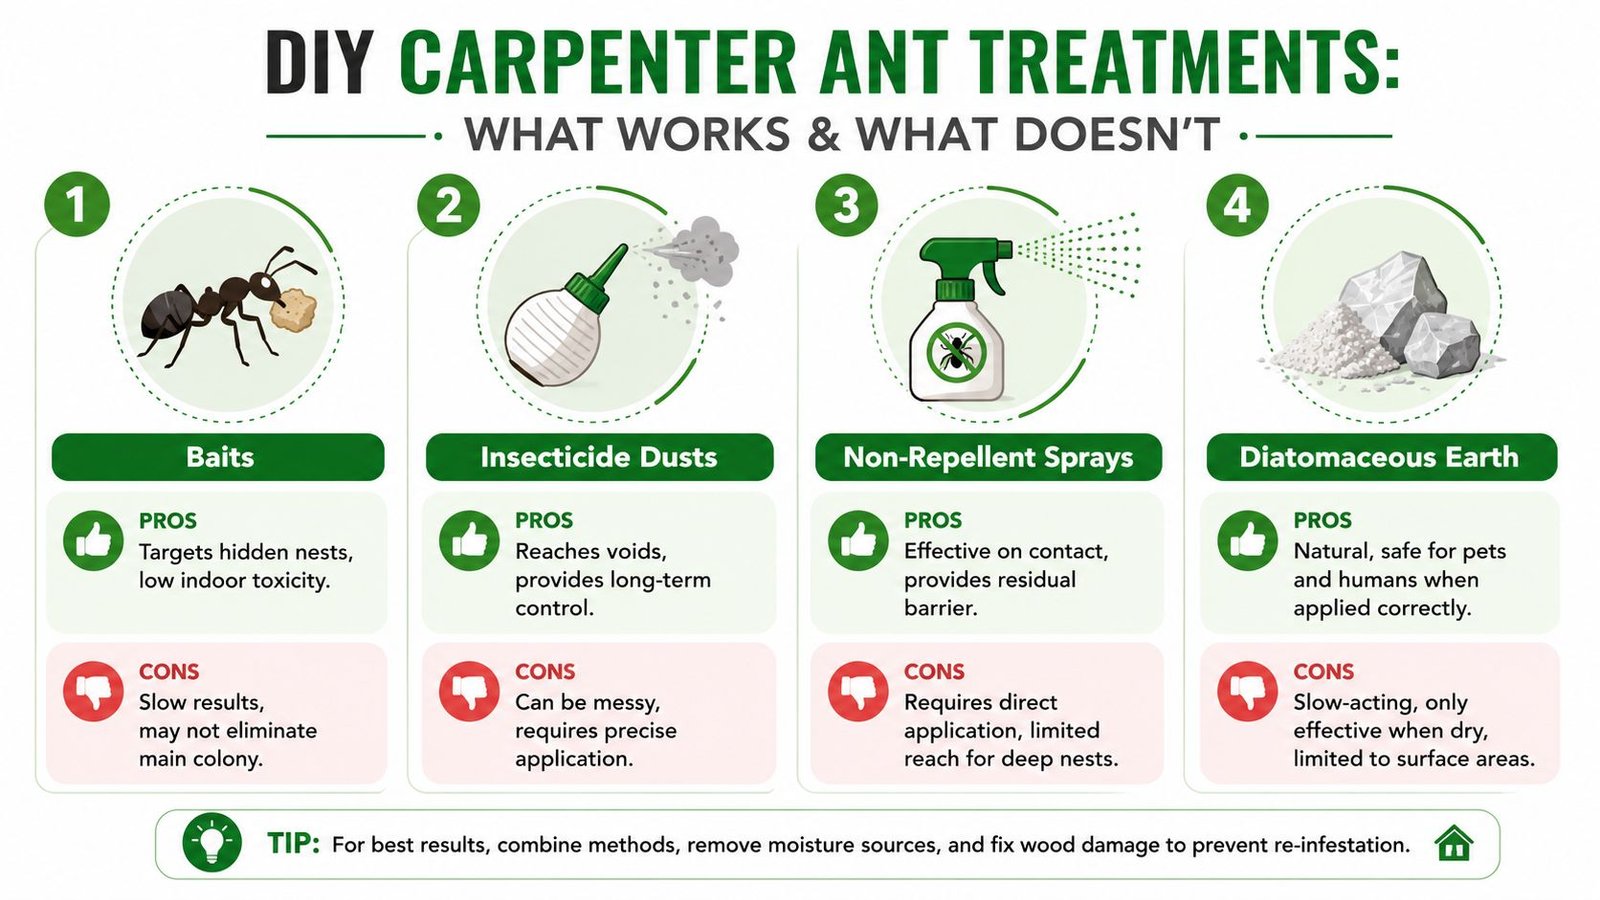
You find a line of big black ants in the kitchen, spray the ones on the counter, and feel better for a day. Then they show up again by the baseboard, or near a window, or coming out after dark. That pattern is common in Toronto homes, especially in spring and early summer when damp wood and hidden voids let colonies stay active out of sight.
DIY treatment can reduce activity. It rarely works well when the nest is deep in a wall, under a porch, or split between a parent nest outside and a satellite nest indoors.
What DIY methods can do
Each product type has a specific job. Problems start when homeowners expect one product to handle every stage of the infestation.
| DIY method | Where it helps | Main limitation |
|---|---|---|
| Baits | Along active indoor trails where workers are feeding consistently | Slow results, and poor placement means workers may ignore it |
| Dusts | Wall voids, cracks, and narrow gaps if the nest area is known | Hard to place properly without opening the area or overapplying |
| Non-repellent sprays | Exterior travel routes, entry points, and parts of the foundation | Less useful if ants are nesting inside damp structural wood |
| Contact sprays | Immediate knockdown of visible ants | Kills the ants you see, not the colony producing them |
Baits are often the best DIY starting point when carpenter ants are following a stable route indoors. Leave the trail alone long enough for workers to feed and carry material back. If the trail disappears because it was sprayed first, bait usually performs worse.
Dust can work well in the right hands. The issue is access. In older Toronto houses with finished basements, plaster walls, tight soffits, or enclosed porch roofs, the nest area is often hidden behind materials a homeowner should not start opening casually.
Contact sprays have their place. They are useful for immediate relief when ants are active in a living space. They should not be mistaken for full control.
Why DIY often stalls out
Carpenter ants are not like pavement ants around a sidewalk crack. The visible workers may be foraging far from the actual nest, and in many Toronto properties there is more than one nesting point involved because moisture-damaged wood indoors can support a satellite colony while the main colony stays outside.
That creates a real trade-off. A homeowner can spend less and try targeted baiting first, especially when activity is light and limited to one area. But if ants keep shifting rooms, returning after treatment, or appearing from wall voids and window frames, the colony has usually not been reached.
Spraying everything you see can make the job harder. It disrupts trails, scatters activity, and turns a traceable problem into a guessing game.
Why moisture repair helps, but does not finish the job
Fixing a leak, improving ventilation, or replacing wet wood removes the condition carpenter ants like. It does not automatically remove the ants already established inside the structure.
I see this often after Toronto winters. Ice damming, condensation around older windows, and slow roof or plumbing leaks create damp sections of wood. The repair gets done, which is the right move, but ants continue showing up because the colony is still active in a void nearby. Once galleries are established, the insects do not leave just because the area starts drying out.
Moisture correction prevents repeat conditions. Nest treatment deals with the ants that are already there.
A practical DIY approach
Use a measured process instead of throwing products at every room.
- Fix the moisture issue first: Stop active leaks and dry the area as much as possible before treating.
- Use bait only where ants are actively foraging: Place it on known routes, not randomly around the home.
- Avoid broad indoor spraying: It usually reduces visibility, not the infestation.
- Treat outdoor entry points carefully: Focus on places where ants are entering, such as utility gaps, foundation joints, or door thresholds.
- Monitor for one clear pattern: If activity spreads, returns, or appears from a new void, DIY has likely reached its limit.
The limit matters. If carpenter ants are coming from structural wood, a ceiling void, a porch connection, or an area that stays damp after repairs, store-bought treatment usually becomes a short-term measure instead of a real solution.
Creating a Carpenter Ant Proof Home Environment
A lot of Toronto homeowners reach this stage after the same frustrating pattern. The ants slowed down for a bit, the leak got fixed, and then a few more show up near a window, a baseboard, or the back entrance. That usually means the house still offers moisture, shelter, or easy access.
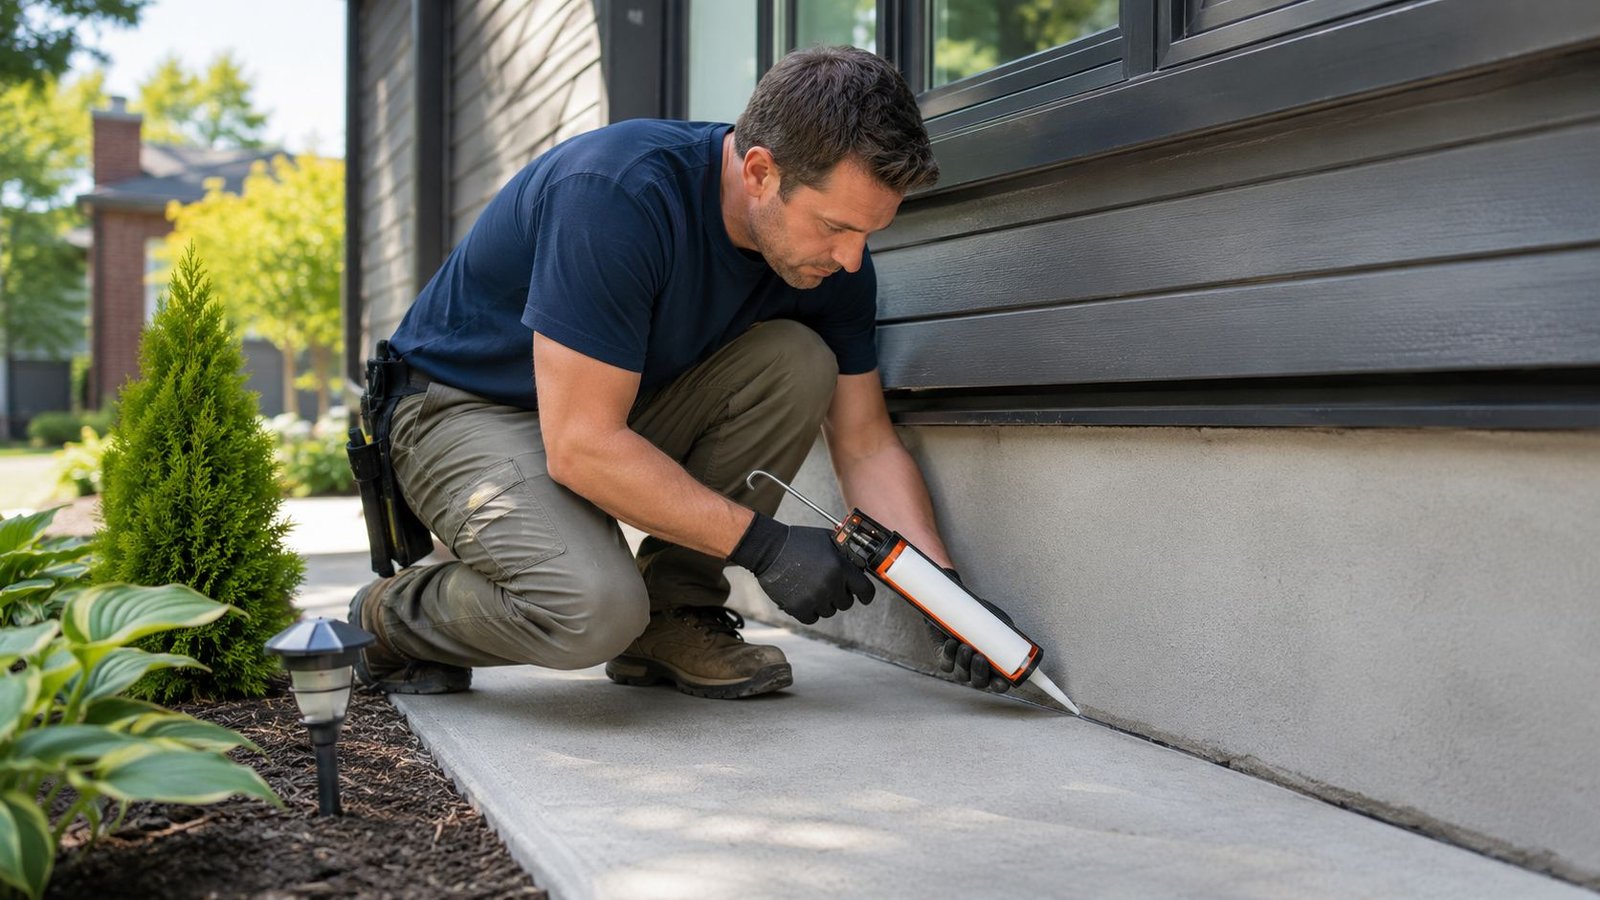
A carpenter ant proof home starts with the exterior. In this climate, spring thaw, heavy summer rain, and winter ice buildup all put stress on siding, trim, soffits, and the wood around decks and porches. If those areas stay damp, ants have a reason to keep exploring.
Moisture control that actually reduces risk
Focus on drainage first. Downspouts should carry water well away from the foundation, not dump it beside the house. Soil should slope away from the structure so water does not collect along the base. Mulch, dense ground cover, and stacked landscaping materials should also be pulled back from exterior walls to help the area dry properly.
Roof edges and upper-story details matter too. In Toronto, I pay close attention to eaves, fascia, chimney flashing, and tree limbs over the roofline because those are common moisture and access points. Branches that touch the house give ants a direct route in. Wet roof or soffit wood gives them a place to settle.
Closing the access routes around the structure
Prevention works best when repairs are specific and consistent.
- Seal openings at the foundation and exterior wall line: Check utility entries, hose bibs, conduit gaps, window frames, and door thresholds.
- Replace water-damaged wood: Soft trim, rotted sills, and failing porch or deck boards should be removed and rebuilt with suitable exterior materials.
- Keep wood and debris off the house: Firewood, scrap lumber, old planters, and leaf buildup create shelter and hold moisture where ants want it.
- Cut back vegetation touching siding or roofing: Shrubs and vines trap dampness and make inspections harder.
- Inspect vulnerable areas each season: Basements, attached garages, porches, fences, and deck connections often show early wear before the problem is obvious indoors.
Material choice matters during repairs. If you are replacing exterior components exposed to regular wetting, FenceScape's treated lumber guide gives a useful overview of where treated wood makes sense for outdoor structures.
Good prevention also reduces how often stronger treatment is needed inside the home. That matters for families with kids, pets, or anyone who wants a safer, longer-term fix instead of repeated short-term applications.
When to Call a Professional Exterminator in Toronto
You spot a few large ants near the kitchen sink after a warm spring rain, wipe them up, and assume that's the end of it. Two days later, more show up by the basement laundry area. A week after that, one turns up in an upstairs bathroom. In Toronto homes, that pattern usually means the ants are not wandering in by chance. They are working established routes through the structure.

DIY treatment has a place, especially when activity is light and the source is obvious. It stops being enough when sightings keep shifting from room to room, or when moisture repairs have been made and the ants still return. In older Toronto houses, and in homes with additions, porches, roof transitions, or finished basements, carpenter ants often use voids that a homeowner cannot inspect properly without opening walls.
Clear signs DIY treatment has reached its limit
A professional visit is justified when the problem points to nesting inside the building, satellite colonies, or repeated reinvasion from exterior wood.
- Activity keeps coming back after targeted DIY treatment: If baiting or spot treatment reduces sightings for a short time but never ends them, the colony has likely not been reached.
- Ants appear on different floors or in unrelated rooms: That usually suggests hidden travel routes in wall voids, under subfloors, around plumbing lines, or through roof and soffit connections.
- You find frass, hollow-sounding wood, or faint rustling in a wall: At that point, the issue has moved beyond nuisance ants.
- You see interior activity along with exterior risk areas: Deck framing, window sills, porch posts, garage trim, and damp fascia often connect to the indoor problem.
- The home has recurring moisture or wood decay issues: Carpenter ant control holds better when treatment and structural correction happen together.
Time is the trade-off. A few extra weeks of trial-and-error can let a hidden nest stay active through a damp Toronto spring or summer, especially after freeze-thaw damage or roof leakage has already softened wood. By the time many homeowners call, they are no longer paying for ant control alone. They are trying to limit further damage and stop the same colony from shifting deeper into the structure.
What a professional treatment process usually looks like
A proper service call should start with inspection, not spraying. I look for where the ants are foraging, where the moisture problem is, and whether there is likely one nest or several connected sites. Evening visits can help because carpenter ants are often more active after dark, especially in warmer months.
Treatment is usually built around targeted placement and correction of the conditions supporting the colony.
| Professional step | Why it matters |
|---|---|
| Interior inspection of active zones | Confirms where ants are trailing and where nesting may be hidden |
| Targeted treatment in wall voids, entry points, or activity areas | Reaches the colony path without unnecessary over-application |
| Exterior inspection around decks, trim, soffits, and foundation edges | Finds satellite nesting sites and entry routes common in Toronto homes |
| Moisture and damaged wood assessment | Identifies why the colony chose that area in the first place |
| Follow-up recommendations | Reduces the chance of recurrence after treatment is complete |
Homeowners who are done guessing can review professional ant exterminator services in Toronto when the problem has clearly moved beyond spot treatment.
A carpenter ant call often reveals two jobs at once. Pest control handles the colony. Repairs handle the conditions that allowed it to settle in.
That is why the decision should not rest on the treatment invoice alone. It should also account for what happens if active galleries remain in damp trim, porch framing, attic transitions, or wall voids that are hard to monitor without proper inspection.
Ensuring Safety During Carpenter Ant Treatment
Safety matters more than speed when treating carpenter ants in a Toronto home. Families with children, pet owners, and anyone treating a kitchen, basement suite, or shared interior area should assume that over-application creates unnecessary risk without improving results.
Safe handling matters more than speed
Any homeowner using a DIY product should read the label fully before opening it. Application sites, ventilation requirements, re-entry directions, and storage rules aren't technical fine print. They're the instructions that prevent accidental exposure.
A safe setup usually includes these basics:
- Keep children and pets away from treatment zones: Especially near baseboards, utility entries, cabinet voids, and under-sink areas.
- Apply only where the label permits: More product doesn't mean better control.
- Store leftovers securely: Products shouldn't remain in easy-to-reach laundry shelves, mudrooms, or under open sinks.
- Avoid food-contact areas unless explicitly permitted: This matters in kitchens, cafés, shared lunchrooms, and basement bars.
Why targeted application is safer than over-spraying
The biggest DIY mistake is treating every visible surface instead of the routes ants use. Broad spraying can spread residue where people and pets live while missing the nest completely. Targeted treatment is safer because it narrows exposure and improves the chance of affecting colony behaviour where it counts.
For severe infestations, trained technicians generally provide the safer path because they work with focused placement rather than panic application. That's especially important in Toronto homes with finished basements, tight utility chases, and occupied rooms where ants move through hidden spaces rather than open ones.
Frequently Asked Questions About Carpenter Ants
Will carpenter ants leave after a leak is fixed
Not always. Fixing the leak removes a major attractant and helps prevent future nesting, but an established colony can remain active in the structure after the wood begins to dry.
Do carpenter ants eat wood like termites
No. They excavate wood to create galleries for nesting. That's why homeowners often notice sawdust-like debris rather than mud tubes.
What part of the house should be checked first
Start with the places where moisture and wood meet. In Toronto homes, that usually means basements, window frames, under porches, attic leak areas, deck connections, and plumbing walls.
Are a few ants enough to worry about
A few ants don't automatically mean a major indoor nest. Repeated evening sightings, ants in multiple rooms, or larger numbers indoors deserve a much closer look.
Can damaged wood just be dried and painted
No. Compromised wood should be replaced with sound material when structural damage is present. Surface repair alone doesn't correct the condition that attracted carpenter ants.
What works best for long-term control
Long-term control comes from combining nest treatment with prevention. That means dealing with the colony itself, correcting moisture, sealing access points, and replacing vulnerable wood where needed.
Toronto homeowners who are tired of seeing carpenter ants return after sprays, bait stations, or leak repairs can get expert help from Vanish Pest Control Inc.. The team handles carpenter ant problems across Toronto and the GTA with targeted inspections, family-conscious treatment methods, and practical prevention advice that addresses the colony and the conditions behind it.




